Tracking Per-Call AI Model Usage and Cost: 2026 Guide
A 2026 guide to tracking per-call AI model usage and cost: schemas, proxies, pricing tables, and dashboards to cut spend. Learn how—start now.
March 23, 2026
Modern software runs on AI. But this rapid adoption comes with a serious challenge: runaway expenses. A staggering 78% of early adopters said that half or more of their generative AI use cases cost more than expected to get into production. Without a plan, AI quickly becomes a budgetary black hole.
The problem is a lack of visibility. When your monthly bill arrives as a single, opaque number, you have no way to know which features, users, or teams are driving the spend. The fix is shifting your focus from the monthly total to the atomic unit of consumption: the single API call. Tracking per-call AI model usage and cost means capturing token data from every transaction using tools like SDK callbacks or a central proxy, calculating each call's cost, and tagging it with metadata like user IDs and feature names. This guide breaks down the methods, schemas, and architectural decisions that turn your AI spend from a mystery into a manageable, optimizable asset.
To plan ahead, model per call and per minute costs with SigmaMind AI pricing.
The Foundation: Why Every Single API Call Counts
Before you can build dashboards or set budgets, you must master the fundamentals of tracking at the most granular level. This means understanding exactly what happens each time your application communicates with an AI model.
Per Call Token Usage Tracking
In the world of Large Language Models (LLMs), tokens are the currency. Every piece of text, from the prompt you send to the response you receive, is broken down into these small units. If you are not tracking tokens, you are essentially burning cash with every API call.
Per call tracking involves capturing the precise number of tokens consumed by each individual request. Instead of seeing an aggregate of millions of tokens at the end of the month, you see that one user's request consumed far more tokens than another's. This immediate, granular feedback is critical because it exposes outliers and inefficiencies. You might discover a single unoptimized prompt is responsible for a huge portion of your costs, an insight you would never get from a monthly summary.
Practitioners on Reddit report that even small differences in system prompt length, multiplied across thousands of calls per day, can shift monthly bills by hundreds or thousands of dollars. The compounding effect is real.
Per Call Cost Calculation
Once you know the token count for a call, calculating its cost is straightforward. The basic formula is:
Call Cost = (Input Tokens × Input Token Price) + (Output Tokens × Output Token Price)
It is crucial to use the correct pricing for the specific model and version being called and to account for separate pricing for input (prompt) and output (completion) tokens, a common practice for providers like OpenAI and Anthropic. This is where tracking per-call AI model usage and cost becomes powerful. In a published study, the estimated cost of running a single note was $0.106 with GPT 4 and $0.005 with GPT 3.5 (about a 21× difference). Without per call cost calculation, this kind of inefficiency would go unnoticed until it resulted in a massive bill.
Designing the Event Schema for Every LLM Call
A tracking system is only as good as the data it captures. The event schema, the structured format you use to log each request, is the foundation everything else depends on. Get this right from the start, because retrofitting schema changes across months of historical data is painful.
Required Fields for a Complete Log Entry
Every LLM call log should include these core fields:
| Field | Purpose |
|---|---|
request_id |
Unique identifier to deduplicate and trace a single call |
timestamp |
When the call was made (UTC, millisecond precision) |
model_name |
Exact model identifier (e.g., gpt-4o-2025-05-13) |
model_provider |
The vendor (OpenAI, Anthropic, Google, self hosted) |
input_tokens |
Number of prompt tokens consumed |
output_tokens |
Number of completion tokens generated |
total_tokens |
Sum of input and output |
input_cost |
Calculated cost for input tokens |
output_cost |
Calculated cost for output tokens |
total_cost |
Sum of input and output cost |
api_key_hash |
Hashed identifier of the API key used (never log the raw key) |
user_id |
The end user or customer who triggered the call |
feature_name |
Which product feature initiated the request |
team_id |
The internal team or business unit responsible |
environment |
Production, staging, or development |
latency_ms |
Round trip time for the API call |
status_code |
HTTP response code (200, 429, 500, etc.) |
session_id or trace_id |
Groups multiple calls belonging to one user interaction |
Schema Design Principles
Keep the schema append only. Never update historical records; instead, write correction events. Use a flexible metadata field (a JSON column or key value map) so you can attach new dimensions like campaign_id or prompt_version without a migration. One project manager shared in a YouTube walkthrough that their team wasted two weeks migrating schema when they realized they had not included a prompt_template_id field, which blocked all their A/B testing analysis.
Store costs as integers in microdollars (millionths of a dollar) rather than floats. Floating point arithmetic introduces rounding errors that compound across millions of calls. A call costing $0.000347 becomes 347 microdollars, which is exact and easy to sum.
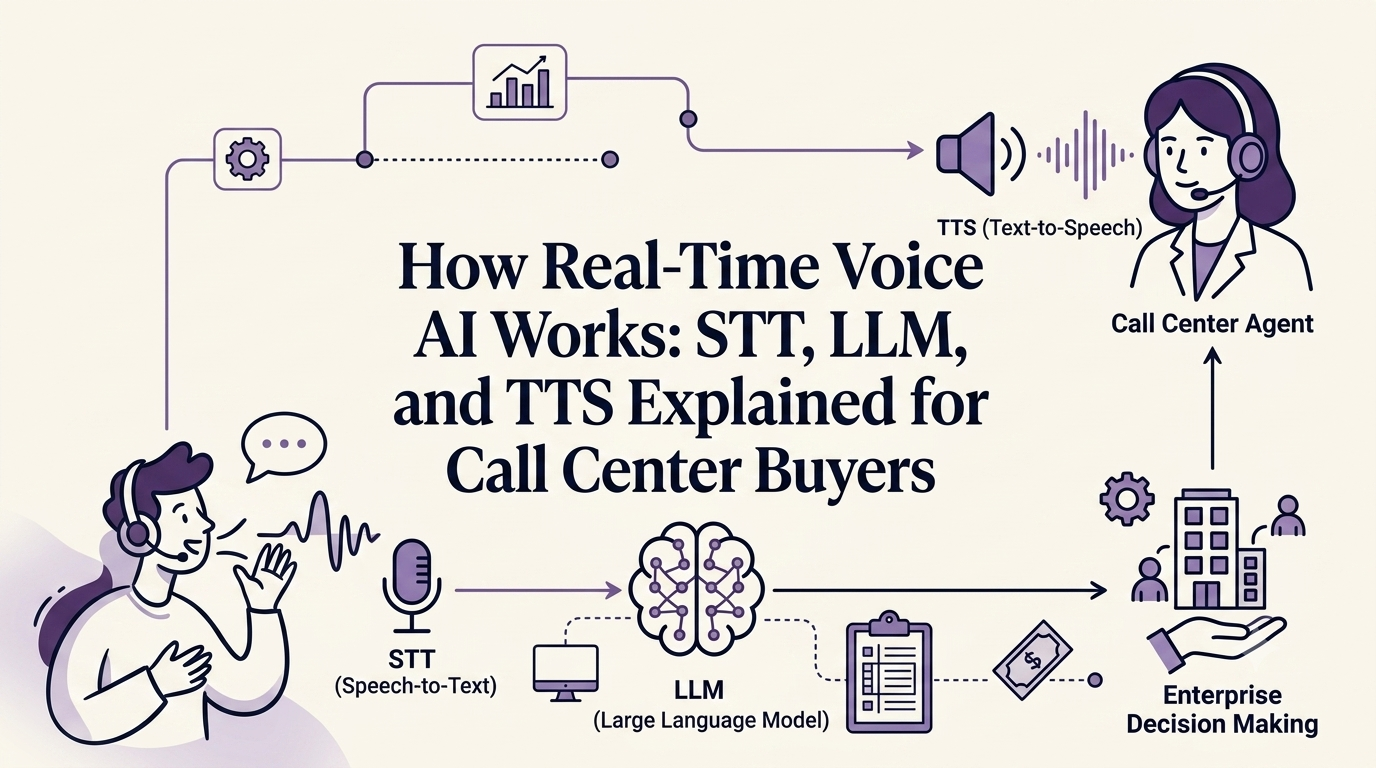
For teams running voice AI agents with multiple provider calls per interaction (speech to text, LLM, text to speech), the SigmaMind AI platform logs every component in a unified trace with this kind of structured schema already built in.
How to Capture the Data: Centralized Proxy vs. Decentralized Client Tracking
With the schema defined, the next decision is architectural: where in your stack do you actually capture this data? There are two main approaches, and the right choice depends on your team's size, provider count, and operational maturity.
Decentralized Client Tracking (SDK Based Instrumentation)
The easiest way to start is by instrumenting each service individually. Frameworks like LangChain and provider SDKs include callbacks that fire after an AI call completes. You hook into these callbacks to run a small piece of code that logs the token usage and other details from the API response.
When this works well:
- Small teams with one or two services calling AI APIs
- Early stage projects where speed of implementation matters most
- Single provider setups (just OpenAI, for example)
Where it falls short:
- Every service must implement and maintain its own logging logic
- Inconsistencies creep in when different teams instrument differently
- Adding a new provider means updating every service
If you want to validate your tracking end to end before rolling it out broadly, the Playground lets you test individual calls and inspect the full response payload including token counts.
Centralized AI Proxy
As you start using multiple AI models from different providers (OpenAI, Anthropic, Google, self hosted models), tracking from each client becomes complex. A centralized AI proxy solves this by routing all AI requests through a single gateway.
This proxy acts as a universal meter. Every call passes through it regardless of destination, and the proxy logs usage, attaches metadata, calculates cost, and forwards the request. It provides a single source of truth and eliminates the need to juggle multiple vendor dashboards.
Advantages of a centralized proxy:
- Uniform schema enforcement across all providers and teams
- One place to update pricing tables when providers change rates
- Easier to implement rate limiting, budget caps, and caching
- Complete visibility without trusting every client to instrument correctly
Tradeoffs:
- Adds a network hop (though typically under 10ms with proper deployment)
- Single point of failure if not designed with redundancy
- Requires infrastructure investment and operational ownership
Practitioners on Reddit's r/MachineLearning frequently recommend starting with client side instrumentation and migrating to a proxy once you hit three or more AI providers. The proxy approach also simplifies optimizing your STT, TTS, and LLM layers because you can swap providers at the gateway without touching application code.
OpenTelemetry Based Tracing
For enterprise grade observability, OpenTelemetry offers an open standard for tracing and metrics. This involves creating a "trace span" for each LLM call and attaching key attributes like the model name, token counts, and calculated cost. The result is that your AI cost data lives directly alongside your application's performance traces, allowing you to correlate a cost spike with a specific user action, a latency issue, or an error in your system.
This approach pairs especially well with the centralized proxy pattern: the proxy creates spans automatically, and downstream services inherit the trace context.
Token Estimation When Counts Are Unavailable
Occasionally, an API or a self hosted open source model might not return the exact token count. In these cases, you can estimate usage by using the model's official tokenizer library, like OpenAI's tiktoken. By running the prompt and response text through the tokenizer yourself, you get a highly accurate count, ensuring no call ever goes unmeasured.
Trace Level Cost Aggregation Per Interaction
Individual call costs matter, but most user interactions involve multiple API calls. A single voice AI conversation might include a speech to text transcription, an LLM reasoning step, a tool call to a CRM, a follow up LLM call, and a text to speech response. Knowing the cost of each component is useful. Knowing the total cost of that entire interaction is essential.
How Trace Aggregation Works
Every call in a user interaction shares a common trace_id or session_id. To get the interaction level cost, you sum all individual call costs that share the same trace identifier. This sounds simple, but it requires discipline in propagating the trace ID through every service and every async callback.
Interaction Cost = Σ (all call costs where trace_id = X)
With trace level aggregation, you can answer questions like: "What is our average cost per customer support conversation?" or "How much does an outbound sales call cost end to end?" These are the numbers that finance teams and product managers actually care about.
For voice AI specifically, platforms like SigmaMind AI handle this automatically. Each conversation logs STT, LLM, and TTS costs as separate line items within a single trace, giving you both component level and interaction level visibility. The analytics dashboard surfaces these aggregated costs in real time.
Practical Example
Consider an e commerce support call where a customer asks about a refund:
- STT call: transcribes customer speech (cost: $0.003)
- LLM call 1: understands intent, decides to check order status (cost: $0.008)
- Tool call: queries Shopify API (no AI cost, but latency recorded)
- LLM call 2: formulates response with refund details (cost: $0.006)
- TTS call: converts response to speech (cost: $0.004)
Total interaction cost: $0.021. Without trace level aggregation, you would only see five disconnected line items with no way to tie them back to a single customer conversation. With it, you can track that this refund handling workflow costs 43% less than the human agent alternative.
Pricing Table Integration and Custom Overrides
AI model pricing changes frequently. OpenAI alone has adjusted prices on major models multiple times in the past year. Different model versions often have different rates, and some providers offer volume discounts or committed use pricing that deviates from the published list price.
Building an Internal Price Table
Maintain a centralized price table that maps each model identifier to its current input and output token costs. The table should be versioned with effective dates so historical cost calculations remain accurate even after a price change.
| Model ID | Provider | Input Price (per 1M tokens) | Output Price (per 1M tokens) | Effective Date |
|---|---|---|---|---|
| gpt-4o-2025-05-13 | OpenAI | $2.50 | $10.00 | 2025-05-13 |
| claude-sonnet-4-20250514 | Anthropic | $3.00 | $15.00 | 2025-05-14 |
| gemini-2.5-flash | $0.15 | $0.60 | 2025-03-25 |
When a provider updates their pricing, you add a new row with the new effective date. Your cost calculation logic always looks up the price that was active at the time of the call, not the current price.
Custom Overrides for Negotiated and Provisioned Rates
Published list prices are often not what you actually pay. Enterprise agreements, committed use discounts, and provisioned throughput plans all create custom pricing that differs from the public rate card.
Provisioned throughput (offered by OpenAI, AWS Bedrock, and others) is particularly tricky. You pay a fixed amount for reserved capacity rather than per token. To make per-call cost tracking meaningful with provisioned throughput, calculate an effective price per token by dividing the provisioned cost by the actual tokens consumed during that billing period.
Effective Price Per Token = Provisioned Period Cost / Total Tokens Consumed in Period
This effective rate can then be used in your standard per call cost formula. Update it daily or weekly as utilization data becomes available. If your provisioned capacity is underutilized, the effective per token price will be higher than the on demand rate, which is a useful signal that you have over provisioned.
Your price table should support override entries that take precedence over published rates. Some teams automate this by pulling billing data from provider APIs and calculating effective rates nightly.
Making Sense of the Data: Adding Context is Everything
Raw token counts are not enough. To truly understand your AI spend, you need to add context to every call. This is where attribution becomes the focus of tracking per-call AI model usage and cost.
Metadata Tagging on Each Request
The most effective way to add context is through metadata tagging. Attach descriptive labels to each API request:
user_idteam_idfeature_namecustomer_idenvironment(production or development)prompt_template_idworkflow_name
These tags turn your raw usage logs into a rich, queryable dataset, allowing you to answer the critical "who, what, and why" behind every dollar spent.
Feature, User, and Team Level Cost Attribution
With proper metadata tagging in place, you can perform powerful cost attribution.
-
Feature Level Cost Attribution: Break down your total bill by product feature to understand your ROI. You might find that a low value feature is consuming a significant portion of your AI budget. Shockingly, only about 32% of companies can allocate even half of their OpenAI bill to the correct features or teams.
-
User Level Cost Attribution: Identify power users or specific customer accounts that drive a disproportionate amount of usage. This is essential for fair pricing and preventing margin erosion.
-
Cost Allocation by API Key or Team: By issuing unique API keys to different teams or clients, you can automatically attribute all usage to the correct budget owner, fostering accountability. For agencies or enterprises managing multiple clients, the agent builder with multi workspace support provides this capability out of the box.
Real Time Dashboards and Alerts for Cost Spikes
Instead of waiting for the monthly bill, a real time dashboard gives you an up to the minute view of your AI consumption. You can see cost per hour, tokens per minute, and usage spikes as they happen. This allows you to react immediately to anomalies before they become expensive problems.
What to Display on Your Dashboard
The most useful dashboards surface a few key views:
- Cost over time (hourly, daily, weekly) broken down by model, feature, and team
- Token consumption rate with trend lines showing acceleration or deceleration
- Top 10 most expensive features/users/prompts updated in real time
- Cost per interaction averaged and shown as a distribution (median matters more than mean here)
- Error rate and retry cost, because failed calls that get retried double your spend
Configuring Alerts That Actually Work
Alerts should be actionable, not noisy. The best practice is to set up tiered thresholds:
- Warning at 70% of daily budget, informational, sent to a Slack channel
- Alert at 85% of daily budget, sent to the team lead with a link to the dashboard
- Critical at 95% of daily budget, triggers an automated response (throttling, model downgrade, or circuit breaker)
Microsoft recommends setting budget alerts at 80% of the monthly budget for cloud resources. The same principle applies to AI spend, but daily granularity is more useful given how quickly LLM costs can spike from a single runaway feature.
Many engineering teams build anomaly detection on top of their cost stream, flagging any hour where spend exceeds 2x the rolling 7 day average for that hour. This catches both gradual creep and sudden spikes.
For teams that want this without building custom infrastructure, SigmaMind AI analytics provides real time cost, token, and call metrics out of the box with configurable alert thresholds.
Prompt and Workflow Cost Outlier Detection
Averages hide problems. The most impactful cost optimization comes from finding and fixing outliers, the prompts or workflows that cost 5x or 10x more than they should.
Identifying Expensive Prompts
If your schema includes a prompt_template_id or workflow_name field, you can group calls by prompt template and compare their cost distributions. Look for:
- Prompts with unusually high input token counts. A system prompt that includes an entire knowledge base when a few relevant paragraphs would suffice.
- Prompts that generate disproportionately long outputs. A summarization prompt that produces 2,000 token summaries when 500 tokens would meet the use case.
- Prompts routed to expensive models unnecessarily. A simple classification task running on GPT 4o when a smaller model would perform identically.
One developer on Reddit's r/LocalLLaMA described cutting their monthly bill by 60% after discovering that a single RAG pipeline was stuffing 8,000 tokens of context into every call when the relevant context was typically under 1,500 tokens. They only found it because they were logging input_tokens per prompt template.
Workflow Level Analysis
Beyond individual prompts, look at entire workflows. An agent that makes five sequential LLM calls to handle a simple FAQ response has a design problem, not a pricing problem. Trace level cost aggregation (discussed earlier) makes this visible.
Sort your workflows by total cost per completion and focus optimization efforts on the top 10%. This is where techniques like model agnostic orchestration become valuable: route simple subtasks to cheaper, faster models while reserving expensive models for complex reasoning steps.
Provisioned Throughput and Effective Price Per Token
For high volume applications, on demand pricing is not always the most economical option. Providers like OpenAI and AWS Bedrock offer provisioned throughput, where you pay for reserved capacity rather than individual tokens.
How Provisioned Throughput Changes Cost Tracking
With provisioned throughput, you commit to a fixed payment (say, $10,000/month) for a guaranteed number of tokens per minute. The challenge for per-call tracking is that individual calls do not have an explicit token price. You need to derive one.
The approach is to calculate an effective price per token:
Effective Input Price = Monthly Provisioned Cost × Input Share / Total Input Tokens Consumed
Effective Output Price = Monthly Provisioned Cost × Output Share / Total Output Tokens Consumed
Where "Input Share" and "Output Share" reflect how the provisioned cost is split between input and output processing (some providers specify this, others require estimation based on their on demand ratio).
Allocation Across Teams and Features
When multiple teams share a provisioned throughput commitment, you need a fair allocation method. The simplest approach: each team's share of the provisioned cost equals their share of the total tokens consumed against that provisioned capacity.
This gets recorded in your per call logs using the effective rate, so all downstream analytics (feature attribution, user level costing, interaction totals) remain consistent. Update the effective rate at least daily as consumption patterns shift.
If utilization consistently stays below 70%, the effective per token cost exceeds what you would pay on demand. That is a signal to reduce your provisioned commitment or consolidate workloads. Conversely, if you are hitting capacity limits, the effective rate is a bargain, and you should consider increasing your reservation.
Cross Model and Provider Tracking
Modern AI applications are heterogeneous. A single user action might trigger calls to OpenAI for text, Anthropic for reasoning, ElevenLabs for speech, and a custom model for recommendations. A complete system for tracking per-call AI model usage and cost must capture and unify usage data from all these sources on a per request basis.
You can wire these providers together via the App Library to keep usage and costs unified per request. For voice AI specifically, SigmaMind AI orchestrates multiple providers while logging every component (speech to text, LLM, text to speech) in one unified trace.
When evaluating voice AI APIs for this kind of multi provider setup, this comparison guide covers the tradeoffs across providers.
From Insight to Action: Controlling Your AI Spend
Capturing and analyzing data is only half the battle. The final step is using those insights to actively manage and control your costs.
Budget Enforcement and Usage Limits
The ultimate form of control is proactive enforcement. Set up automated budget alerts that notify you when spending approaches a threshold. You can also implement hard usage limits or quotas that temporarily block requests when a budget is exhausted, ensuring you never face a surprise overage again.
Some teams implement tiered model fallback as a softer alternative to hard limits. When the budget hits 90%, the system automatically routes new requests to a cheaper model instead of cutting off service entirely. Users still get responses, and costs stay within bounds.
Continuous Optimization Loop
Per-call tracking creates a feedback loop:
- Measure cost per call, per interaction, per feature
- Identify outliers and inefficiencies
- Optimize prompts, model selection, and caching strategies
- Measure again to confirm savings
Teams that run this loop weekly report 30 to 50% cost reductions within the first quarter, according to multiple accounts on LinkedIn from engineering leads at mid stage startups. The savings compound because optimizations to high volume prompts pay off on every subsequent call.
For a concrete example of this optimization loop in action, this e commerce refunds case study shows 4,000+ refunds handled monthly at 43% lower cost, with turnaround dropping from days to under 60 seconds.
Conclusion
As AI becomes more integrated into production software, the ability to perform detailed tracking per-call AI model usage and cost is shifting from a nice to have to a core business competency. By moving beyond aggregate monthly bills and focusing on the individual API call, you gain the clarity needed to optimize prompts, detect cost outliers, evaluate feature ROI, and allocate costs fairly across teams and customers.
The architectural choices matter. Start with a well designed event schema. Pick the right capture method for your scale (client side instrumentation early, centralized proxy as you grow). Build trace level aggregation so you can see interaction costs, not just call costs. Maintain a versioned pricing table with support for custom overrides and provisioned throughput. And close the loop with real time dashboards and automated alerts.
Whether you build a custom solution using the techniques outlined above or use a platform with these capabilities built in, the goal is the same: to make AI a predictable, scalable, and profitable part of your business.
Start building for free with SigmaMind AI, which has embedded this level of granular analytics into its voice AI platform from day one.
Frequently Asked Questions (FAQ)
1. Why can't I just use my cloud or AI provider's monthly bill?
Provider bills typically show aggregate usage, making it nearly impossible to determine which specific features, customers, or teams are driving costs. Tracking per-call AI model usage and cost provides the granular data needed to pinpoint inefficiencies and understand the true ROI of your AI investments.
2. What is the most important metric for tracking AI model usage?
The most critical metric is the token count per API call, broken down into input (prompt) tokens and output (completion) tokens. Because these are often priced differently, tracking both is essential for accurate cost calculation.
3. How can I start tracking AI costs if I have no system today?
A great starting point is SDK based instrumentation. Use callbacks in your existing AI libraries (like LangChain or the OpenAI SDK) to log the token usage from each API response to a simple database or logging service. Then validate your tracking end to end in the Playground before rolling it out broadly.
4. What is the difference between cost attribution and cost allocation?
Cost attribution is the process of analyzing usage data to understand which features or users are responsible for costs. Cost allocation is the action of formally assigning those costs to the appropriate team or customer budget, often for internal chargebacks or external billing.
5. Can I track usage for open source models I host myself?
Yes. Even though you are not paying a provider per call, tracking token usage is still vital for understanding performance and capacity planning. You can use token estimation techniques with a tokenizer library to count the tokens for each request your self hosted model processes. The effective cost can be calculated from your infrastructure spend divided by tokens processed.
6. What should my event schema include for AI cost logging?
Your schema should always include a unique request ID, timestamp, model name and provider, input token count, output token count, the calculated cost, and a hashed API key identifier. Crucially, it must also include fields for metadata tags like user_id, feature_name, team_id, and environment to enable effective cost attribution. Use a flexible metadata field for dimensions you might add later.
7. How do I handle cost tracking with provisioned throughput?
Calculate an effective price per token by dividing your provisioned cost by the total tokens consumed during the billing period. Apply this effective rate to each call in your logs. Update the rate at least daily. If your effective rate exceeds the on demand price, you are likely over provisioned and should consider reducing your commitment.